Day camps are a fun and interactive day of activities that will be built off the Saskatchewan curriculum and infused with arts education (dance, drama, literature, music, and visual art). Day camps are run by a Saskatchewan-certified school teacher. Heavy emphasis on literature. We can focus on subjects of camp attendees’ choice, based on something they may want to explore or a school subject they may be struggling with or want extra help with.
Camp day runs from 9:00-3:00. Drop-off time is no earlier than 7:45 am, and pick-up time is no later than 5:15. Students must bring their lunch, snacks, and water. Fridge and microwave available.
Welcome to Regina Summer Camp FUN! Regina Summer Camp FUN! offers week-long day camps in Regina led by a Saskatchewan-certified school teacher to assist children in softening the student learning loss of 17%-34%.
Regina Summer Camp FUN! week-long day camps incorporate the Saskatchewan curriculum INFUSING it with arts education. The five art strands (dance, drama, literature, music, and visual art) will be extensively incorporated. This means your child will be learning the curriculum all day but having so much FUN they will not even recognize all the intense learning taking place! All subject areas will be explored with special emphasis on English Langage Arts, Math, and Science.
Each summer day camp is 5 days long (except the August long weekend) and runs from 9:00 am to 3:00 pm. Before and after care can be arranged for an additional fee. Students are required to bring their own lunch, snacks and water. Lunchtime is supervised. Each week-long summer day camp is _____ per week. Best suited for ages 6-12 years. Day camps are based out of Regina, Saskatchewan.
Space is very limited. Minimum students are required to run sessions.
For more information, please contact Jana.
The total amount due is $0.00. Payment options are as follows: 1. E-transfer; 2. Mail a cheque in the mail; 3. Monthly payment installments as long as paid in full before the beginning of the chosen session; or 4. Pay online via PayPal.
Right off the bat I want to point out a few things I have learned while refinishing my wood dresser. The very first thing you need to know is that stripping the old layer of paint or stain off is NOT as easy as this Tik Tok portrays, or if it is, I certainly have done things very, very wrong. I also used the CitriStrip, as seen in the Tik Tok, but in my experience, it took a lot more effort than just running the tool up, removing the layer as you moved along.
The second thing you need to know is that when you see things like this: “bought for $50, made $525”, they probably worked for less than minimum wage completing the project.
And lastly, you need to know: DO NOT do this. Please do not line dresser drawers with wallpaper because it SUCKS to remove it when that design is no longer trendy.
Let me demonstrate:
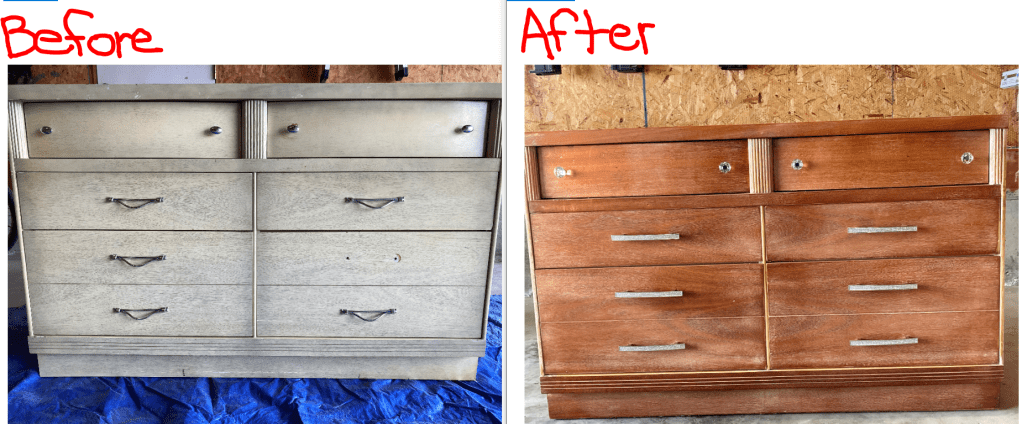
Ok, now that we have that straight, let’s talk about what did go right! The finished dresser ended up with five coats of the Tung Oil. Each coat made it more and more shiny, it is really pretty. A top protective layer is unnecessary. Check out that bling hardware! What 13-year old doesn’t want that!?
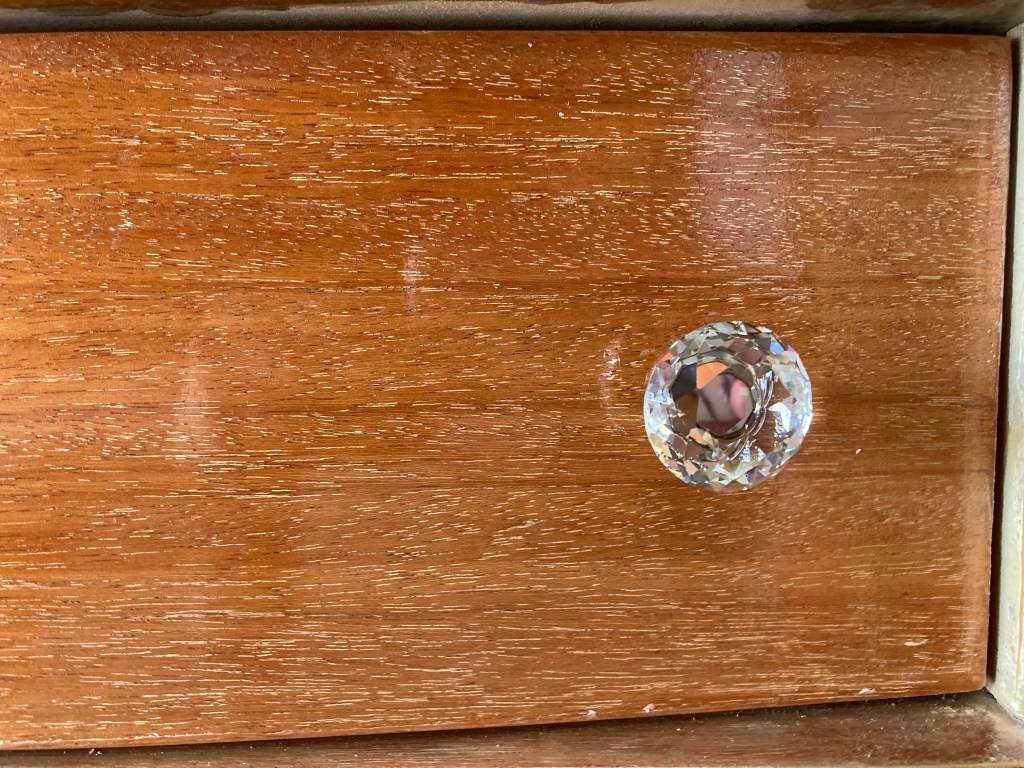
Bling pull handle hardware
Glass knob hardware, top drawers
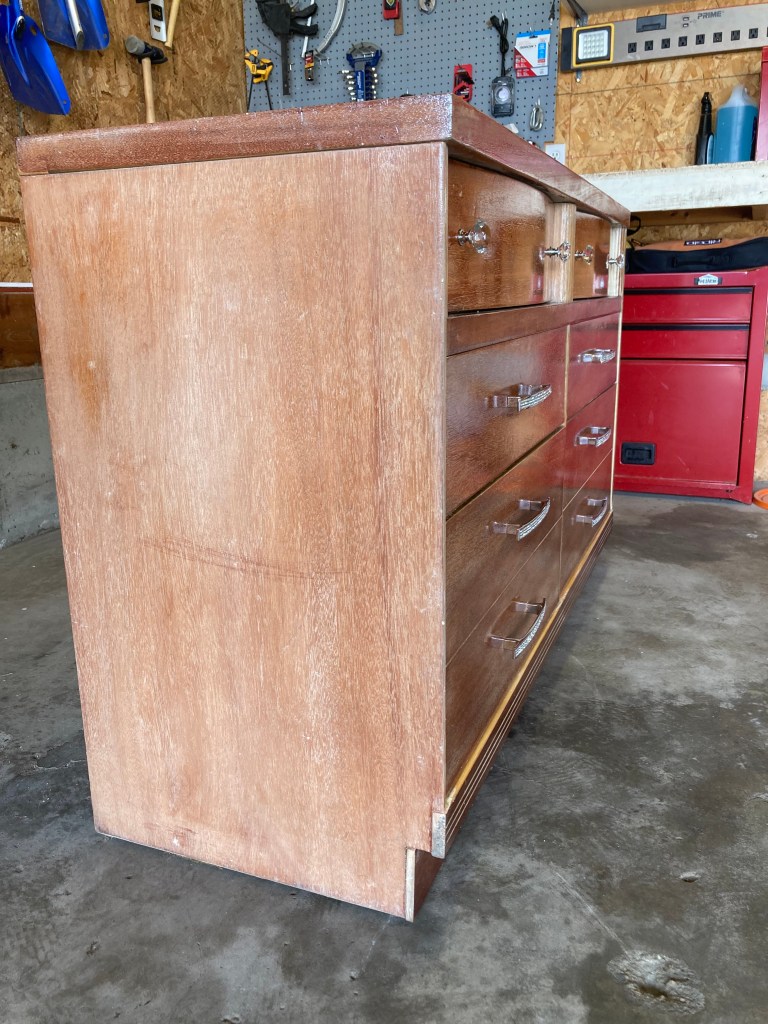
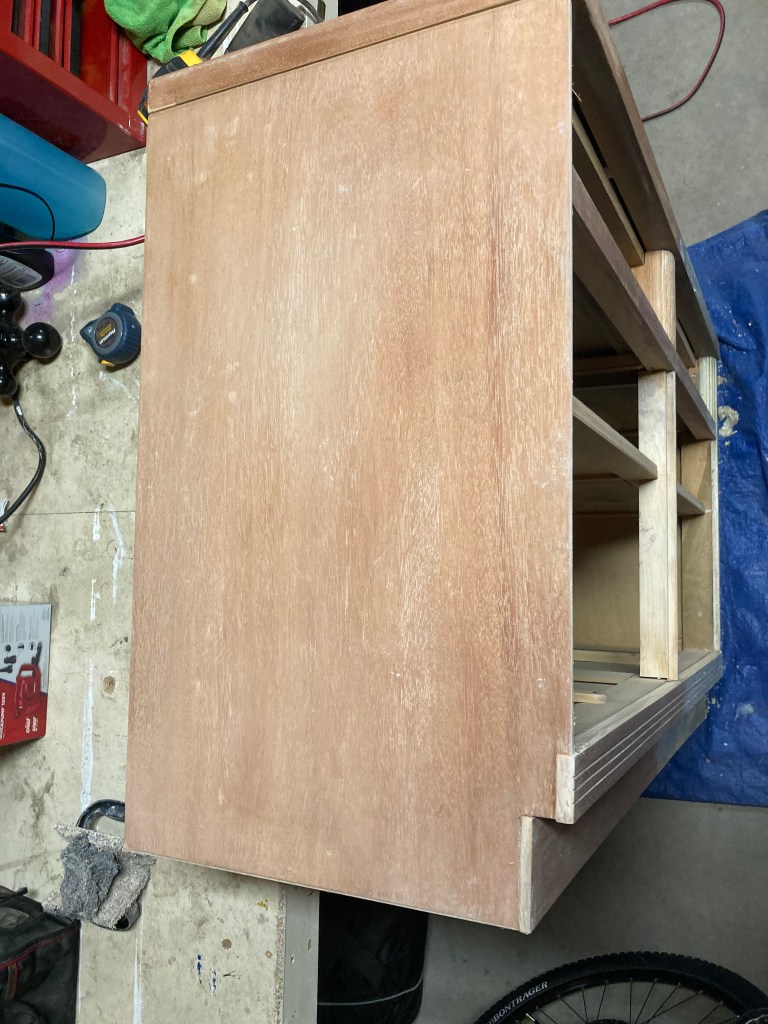
Finished side view
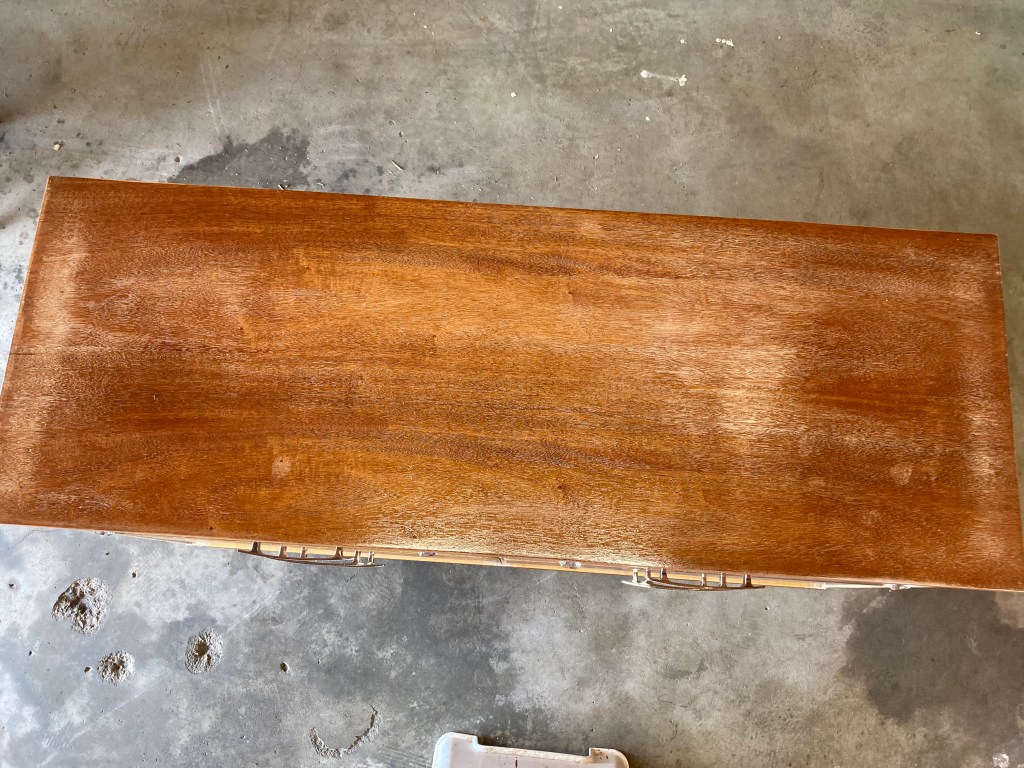
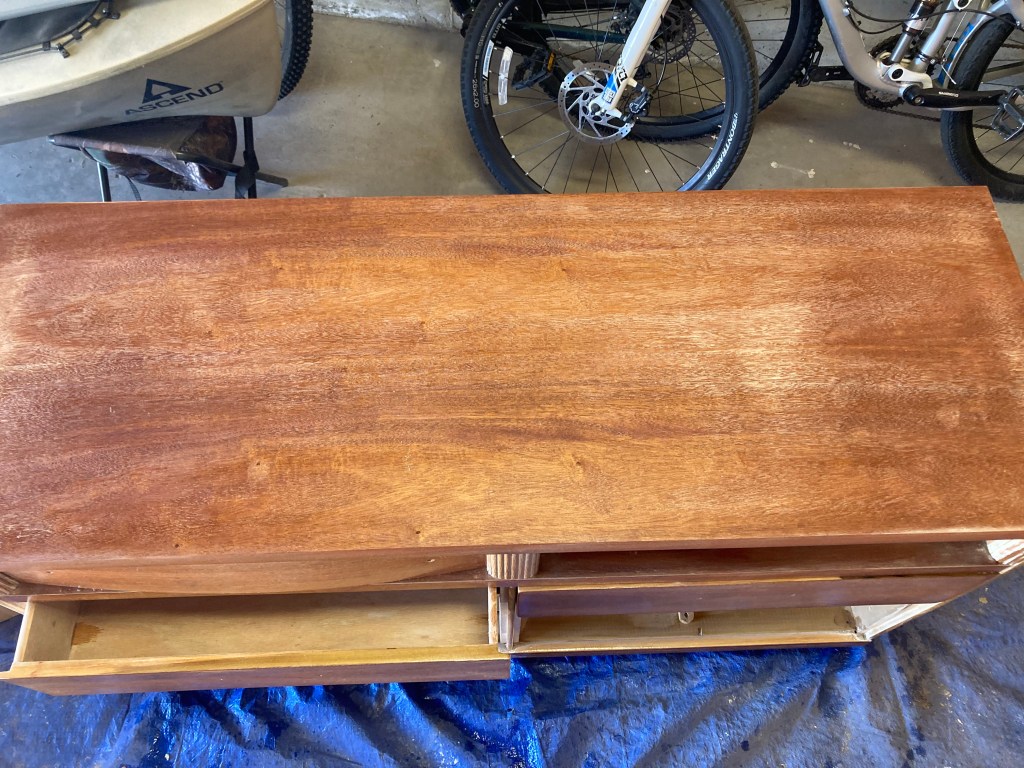
Finished top view
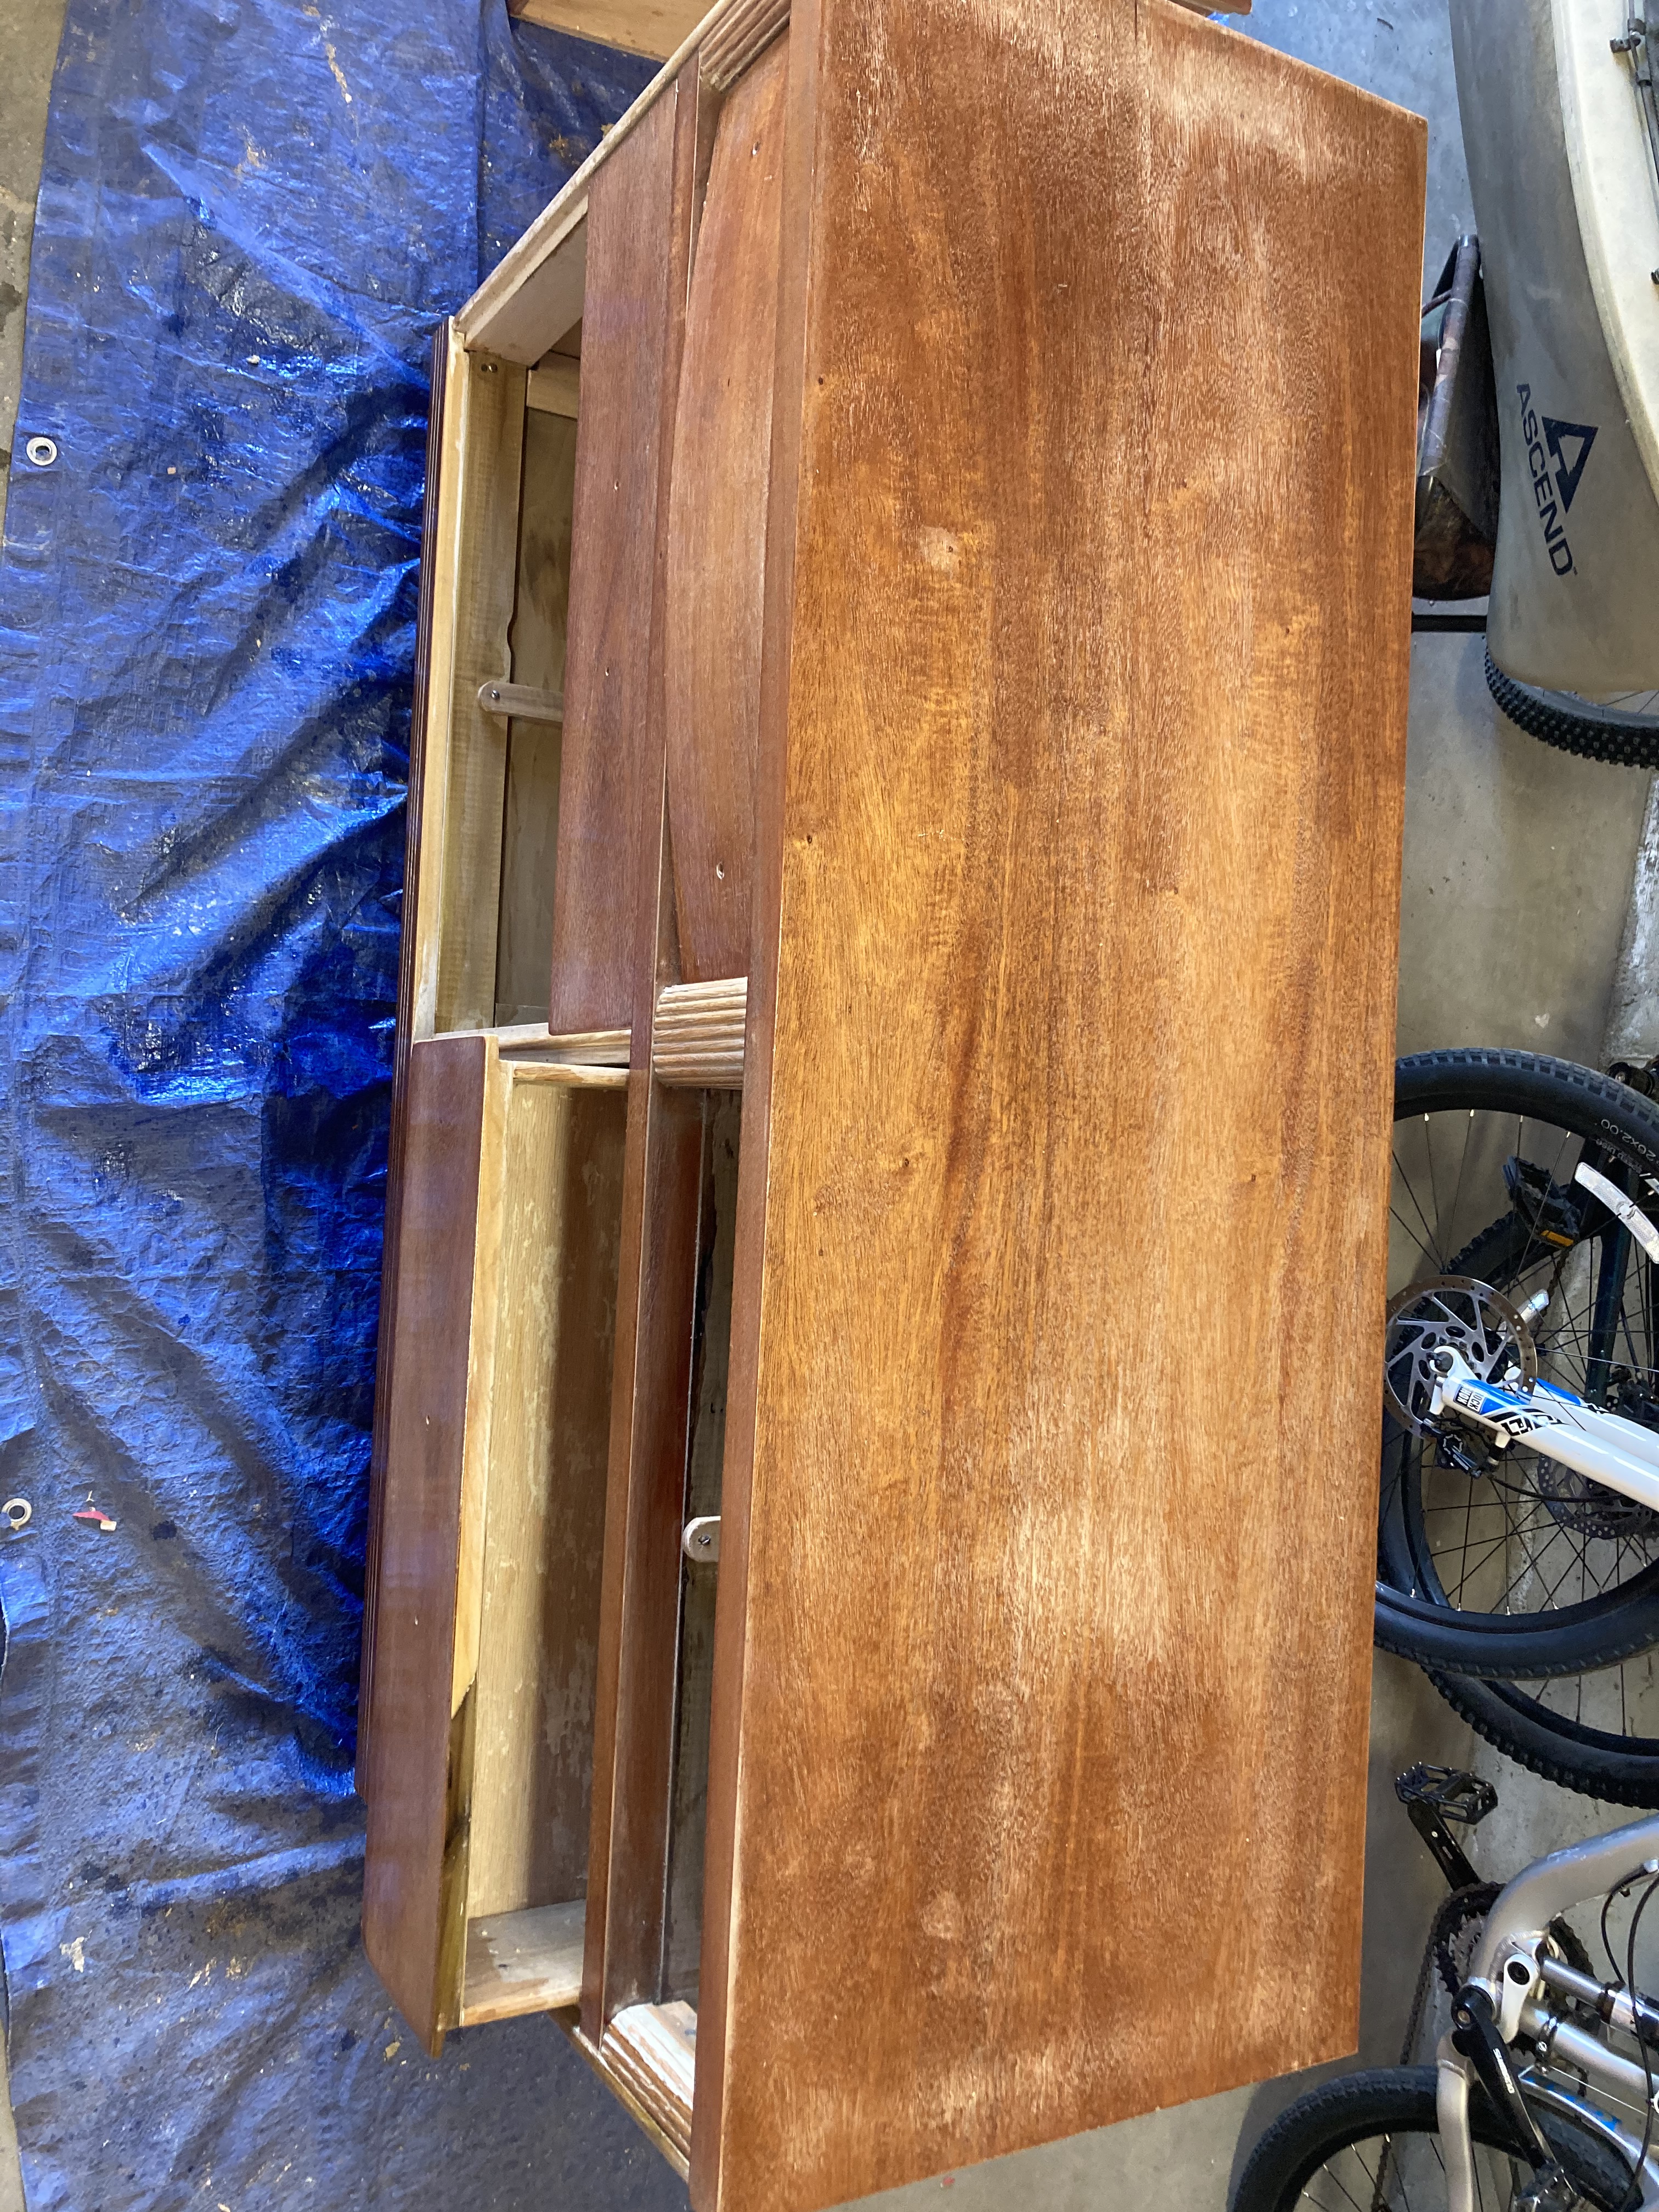
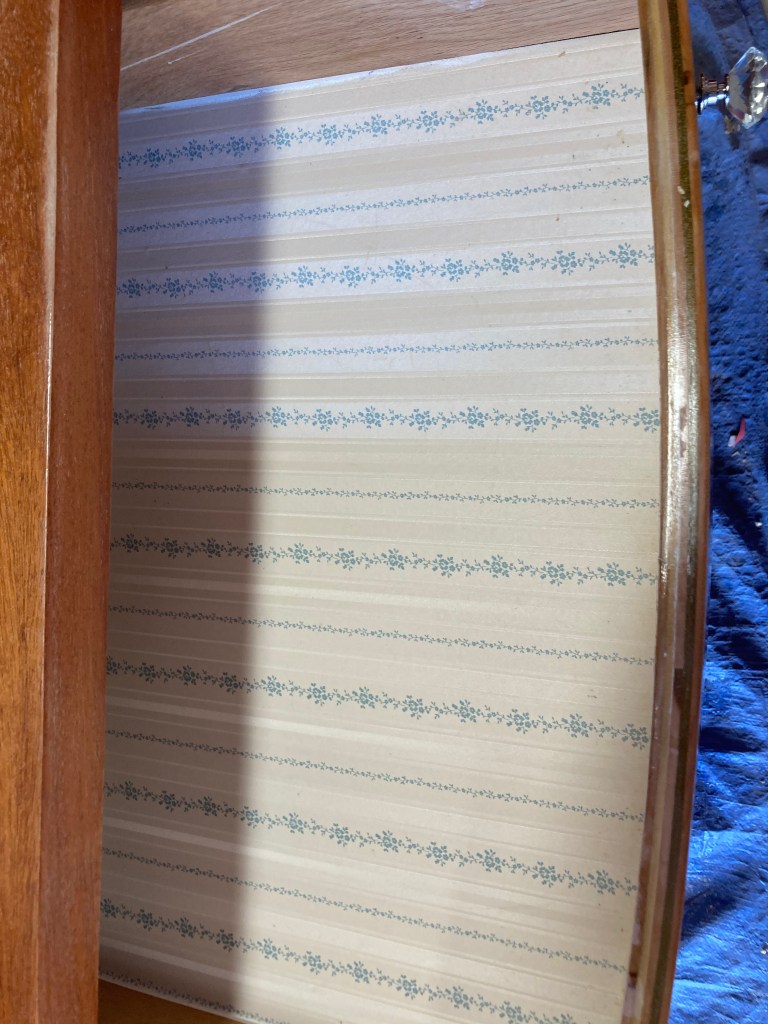
Inside view of drawers
Close up of inside drawers
Left= before, Right= after
This last picture is what the wood dresser looks like in my daughter’s bedroom. We just happened to replace her flooring with hard wood and I think the wood on wood equals absolute perfection! Oh so pretty. Now she is begging me to paint. She is claiming she has outgrown the ‘baby’ purple. Oh, painting is another job where I earn less than minimum wage! OFF for another adventure…………
I had a very busy week preparing my wood dresser by adding two more coats of Tung Oil (24 hours apart). I absolutely love that with each coat it becomes shinier and shinier! It looks glossy to me and I like that look. 5 coats of Tung Oil is actually not necessary. I choose that because I like the shiny look, however, if you prefer a more dull look then 2-3 coats would be completely fine. The first 2 coats soaked right into the wood compared to my 5th coat.
Left: 1 coat of Tung Oil, Right: 5 coats of Tung Oil
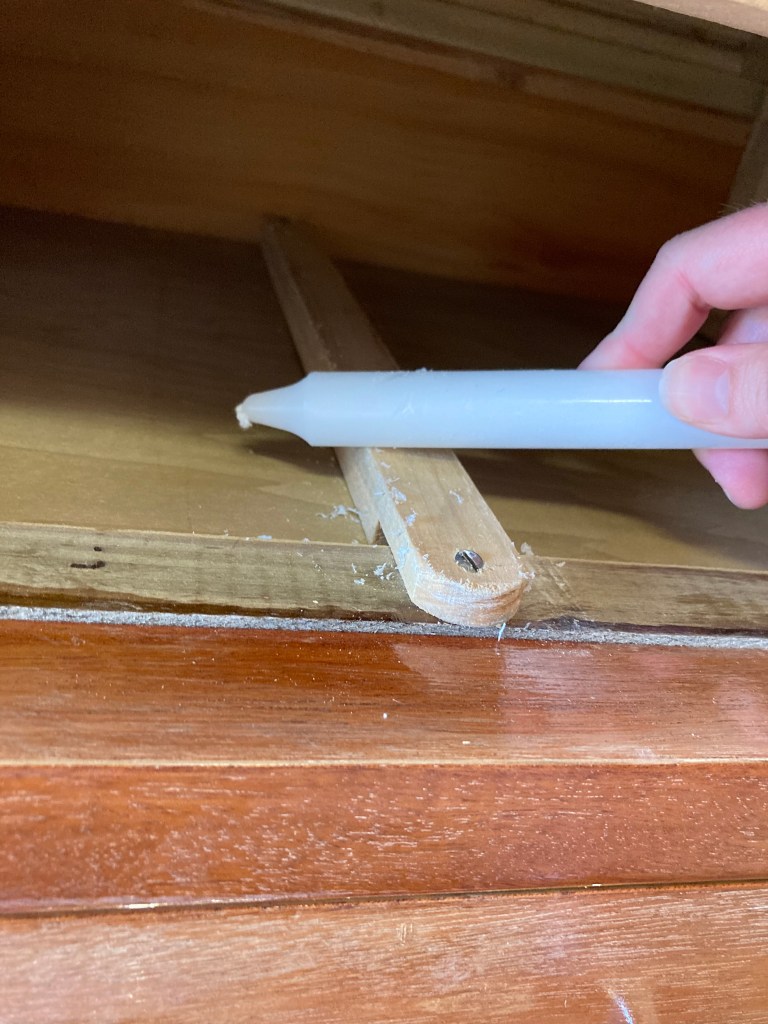
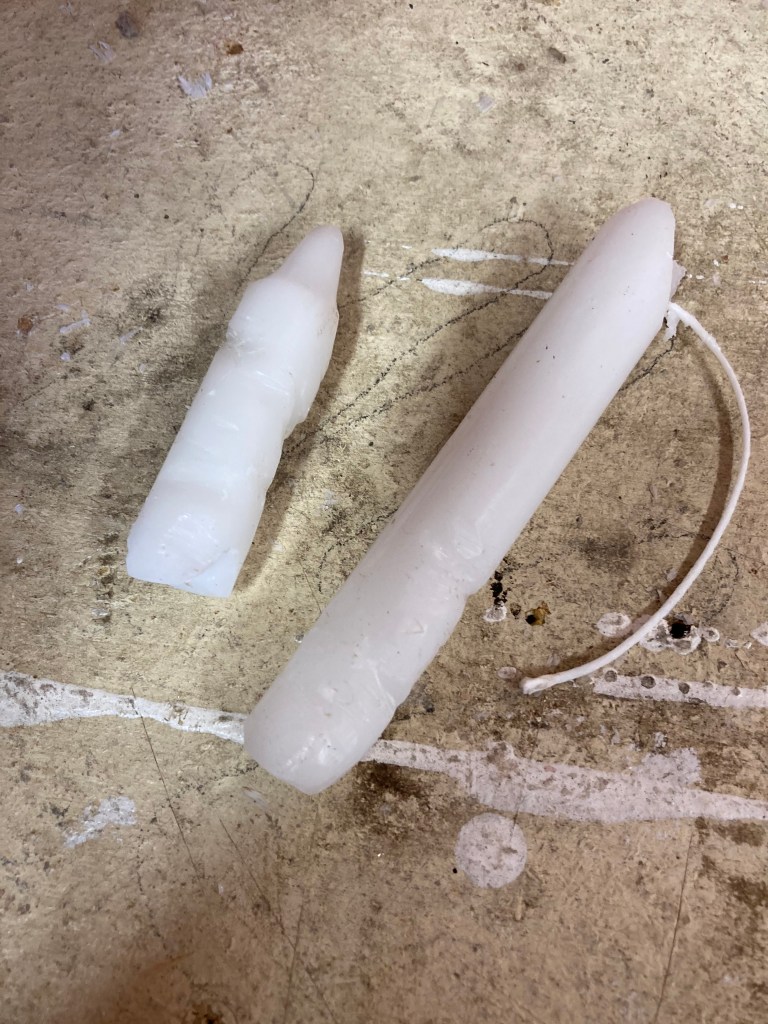
The next thing I did was wax the drawers because they were sticky and they did not slide nicely. I had only been told about this, I had no idea how to actually do it. I thought I had to melt the wax and somehow work with warm wax. Turns out, this was the easiest part of the entire project and this website was very helpful in educating me on this process.
I also made about 9 trips to Home Depot to purchase the new hard ware, an anticipated exciting part of the process but it was so frustrating! My 13-year old daughter claimed this dresser very early in the process even though she does not need it. This complicates placing it in her bedroom because it is a different style than her current dresser and, as it turns out, there are several different styles of dressers! That aside, she wanted to choose the hardware (you are in for a treat!) so she found the most bling possible. So I bought it and attempted to screw it on but my old dresser’s wood must be thinner than modern dressers because the screws were too loose. So trip #2 back to Home Depot to buy washers to act as a filler, otherwise the hardware knob would just spin around. Okay, problem fixed. But then I bought too many knobs and not enough pulls. Trip #3 to return and exchange and luckily Home Depot has an excellent return policy. Next, I attempt to attach the pulls but they are too long, they don’t fit! Are you kidding!? I did not know these were measured, I had assumed they were a standard measurement, but NOPE! Now I am nervous because my dresser is very old and I am concerned that my required size is no longer available (and I still need the 13-year old’s ‘bling’!). Trip #4 I discovered that there are many sizes actually available! Who knew! And they had the bling hardware, in the size we needed. So, okay, 9 trips was an exaggeration but 4 did seem a little excessive to buy what I thought was a simple (but oh so surprisingly expensive) step of refinishing! All said and done, the dresser has (very blingy!) knobs and pulls on it.
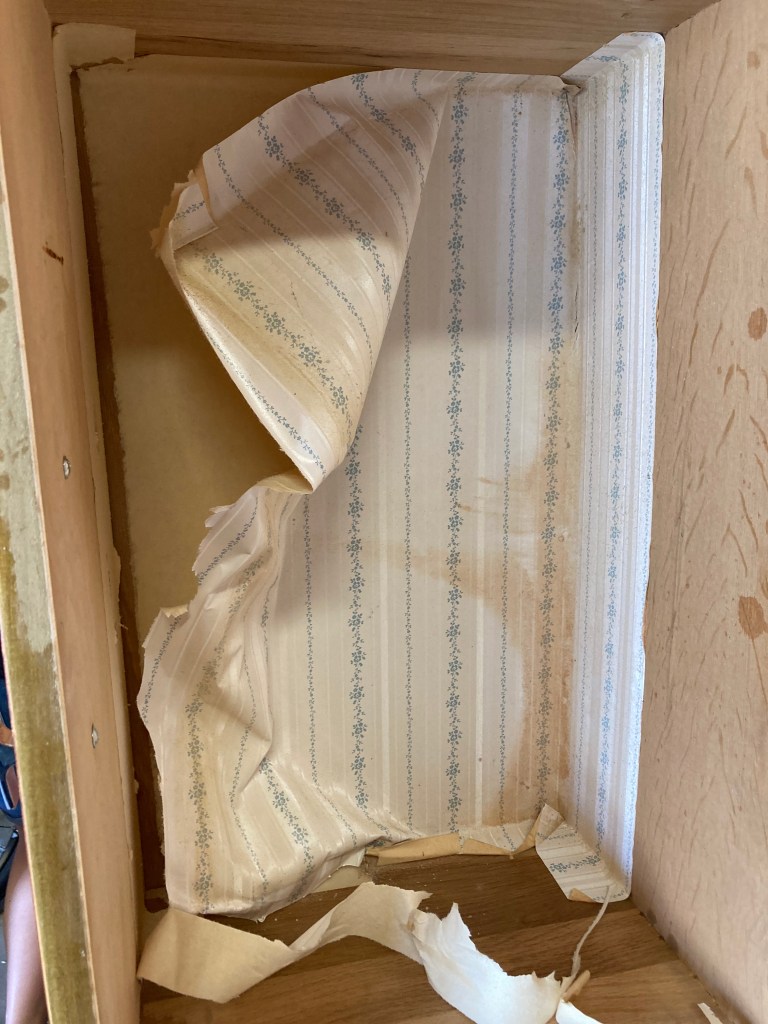
The part of this project I have yet to finish is removing the wallpaper layer from the drawers. This job absolutely sucks so I have left it for last. It is very labour intensive and quite messy.
Top view, stripped and sandedTop view, Tung Oil coat #1Top view, Tung Oil, coat #2Top view, Tung Oil coat #3Top view, before and after
I had to start with the pictures because this has been the part I have been most looking forward to! Getting the wood coat on! I was so excited to see the dresser come alive! I decided to use Tung Oil rather than a wood stain or wood paint because I liked that its purpose it to highlight the natural wood as opposed to completely changing the colour. The one thing you have to know about Tung Oil though is that it STINKS! And the smell lingers for dayyyyyyyyyyyyyyyyyyyyyyys. I applied a new coat of Tung Oil every 24 hours. The directions indicate between 3-5 coats can be applied. With each coat it becomes shinier.
I took a few videos to highlight my process.
Sanding is more work than I anticipated!
Applying the first coat of Tung Oil
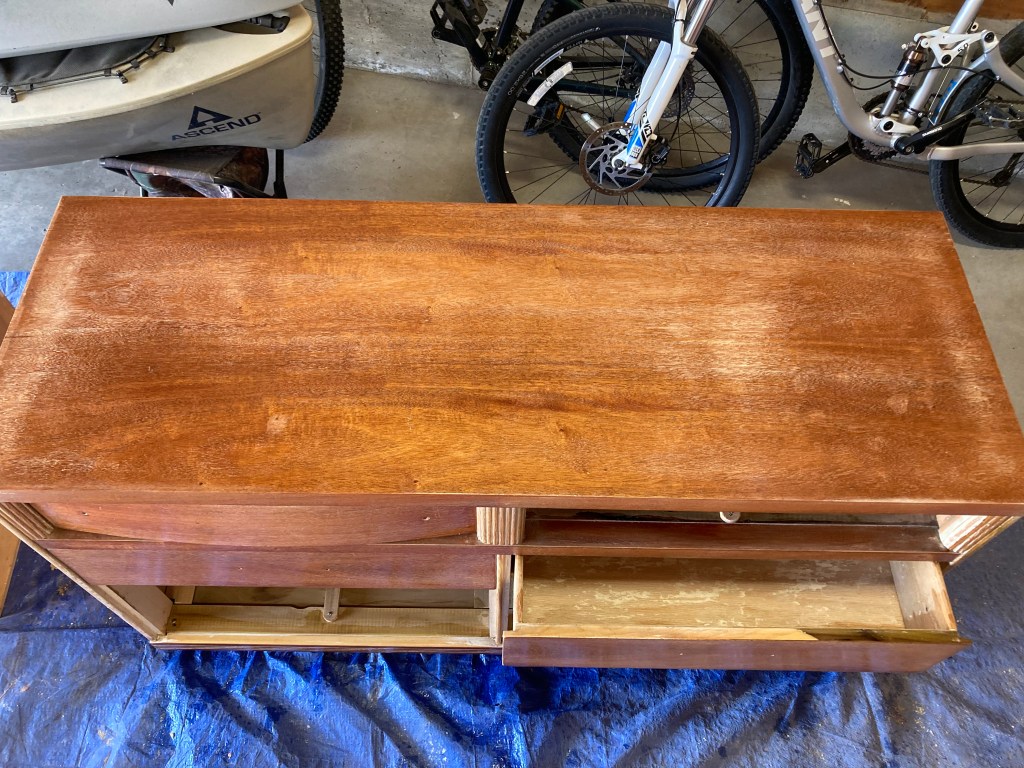
This dresser has six drawers and the drawers are each lined with wallpaper. I hate this! So I decided to remove it. Possibly a bad idea based on the effort it takes to remove!
My week has been extremely busy with this learning project partly because I want to apply 5 coats of Tung Oil therefore it requires my attention for 5 consecutive days. I did have to do some research on how to remove wallpaper from the wooden drawers because what I was trying (‘elbow grease’) simply wasn’t working. I sure wish I had looked at this website or watched this YouTube before attempting to remove the wallpaper! I feel silly now!
I still have a few things left to complete: 1. I want to give it two more coats of Tung Oil; 2. It appears it needs a ‘protective’ layer of some sort (this needs further research); 3. The inside of the drawers need more work to clean off the remaining wallpaper; 4. The drawer runners need a “wax” coat to make the slide smoother (this needs further research); 5. I need to buy 16 drawer handles.
I am excited about this project, happy with the progress, and how the dresser is coming together.
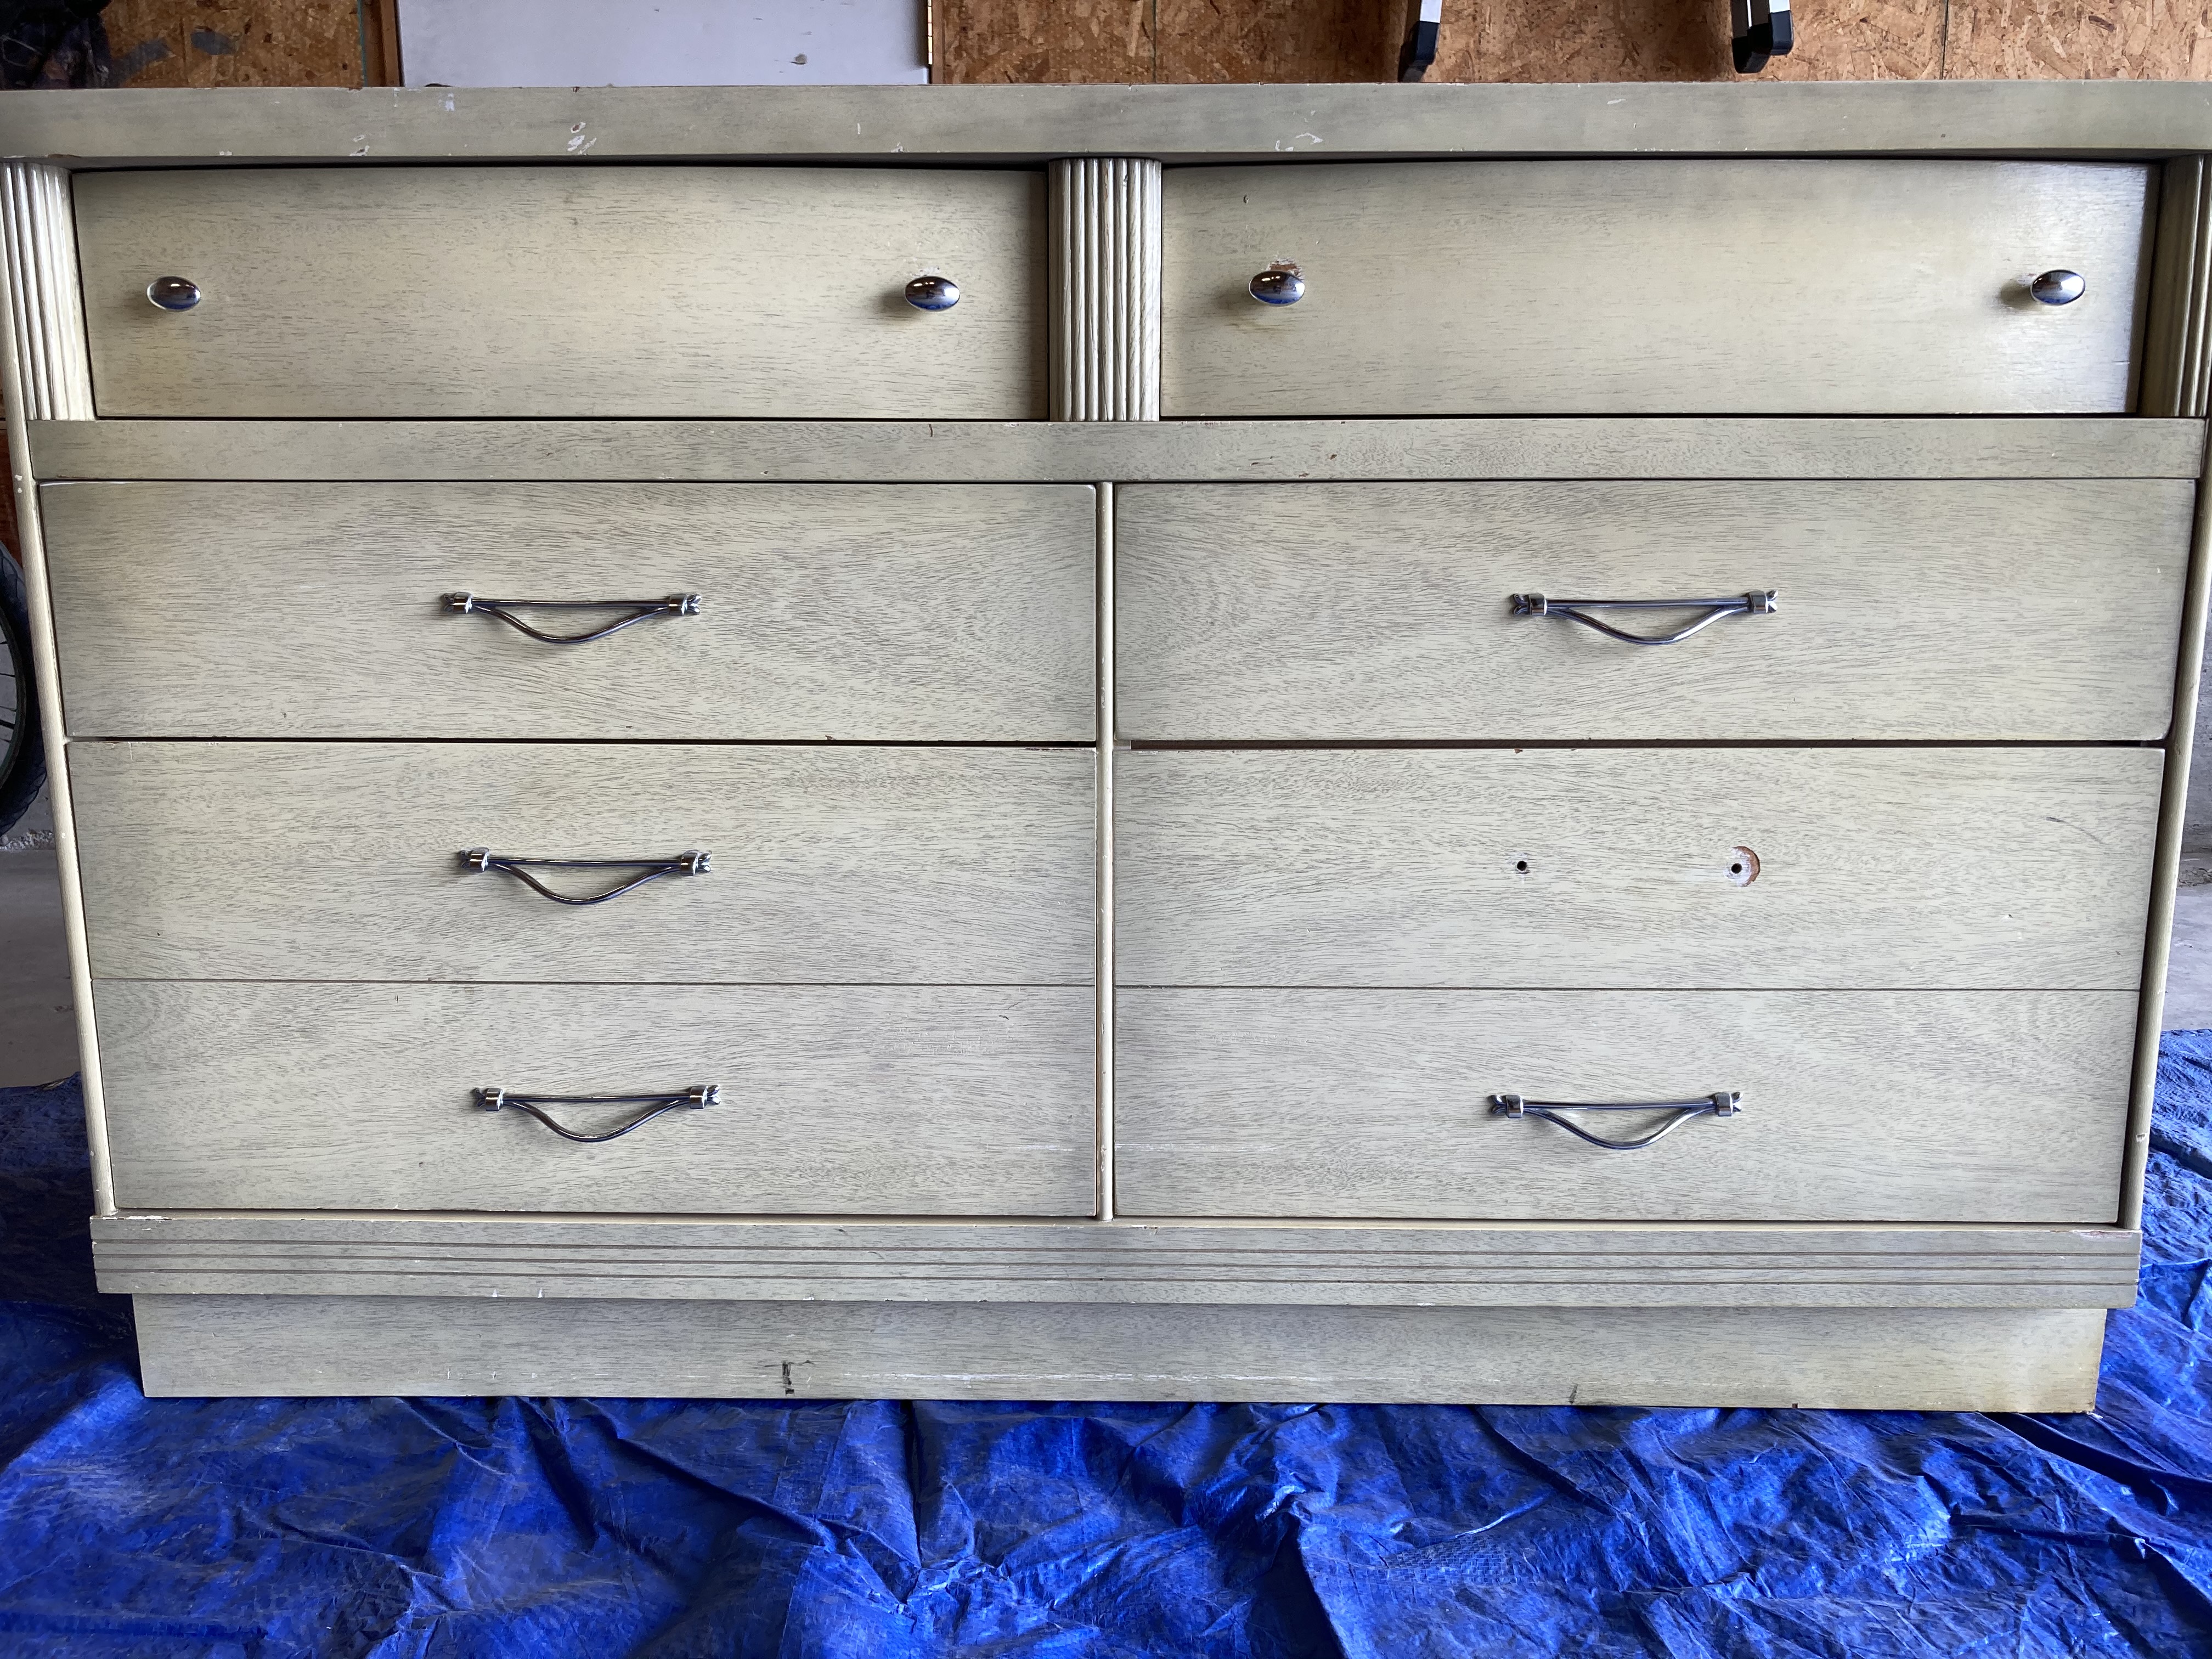
I am well into stripping the paint from my old wood dresser now. I have wondered if this is something I would enjoy doing as a side hobby so I looked into people who do! I found this fabulous podcast by The Zibra Blog where he interviewed Fallon Yates. Fallon gave her top five secret places to find/ buy old furniture for refinishing projects. I already had my dresser on hand, hiding in a dark corner of my basement so I am sure there are many people out there in a similar circumstance! These pieces of furniture are often advertised on Facebook Marketplace, auctions, yard sales, second hand/ thrift stores, or random people just give them away. I have also been looking at refinishing artists for tips and things that have worked for them. Jeanne’s work used a lot of color such as pink and blues, which surprised me. I feel excited to get to the stage of covering my dresser in color but I am still stripping off the old, ugly green paint!
My dresser project, tipped on its end for ease of stripping old paint
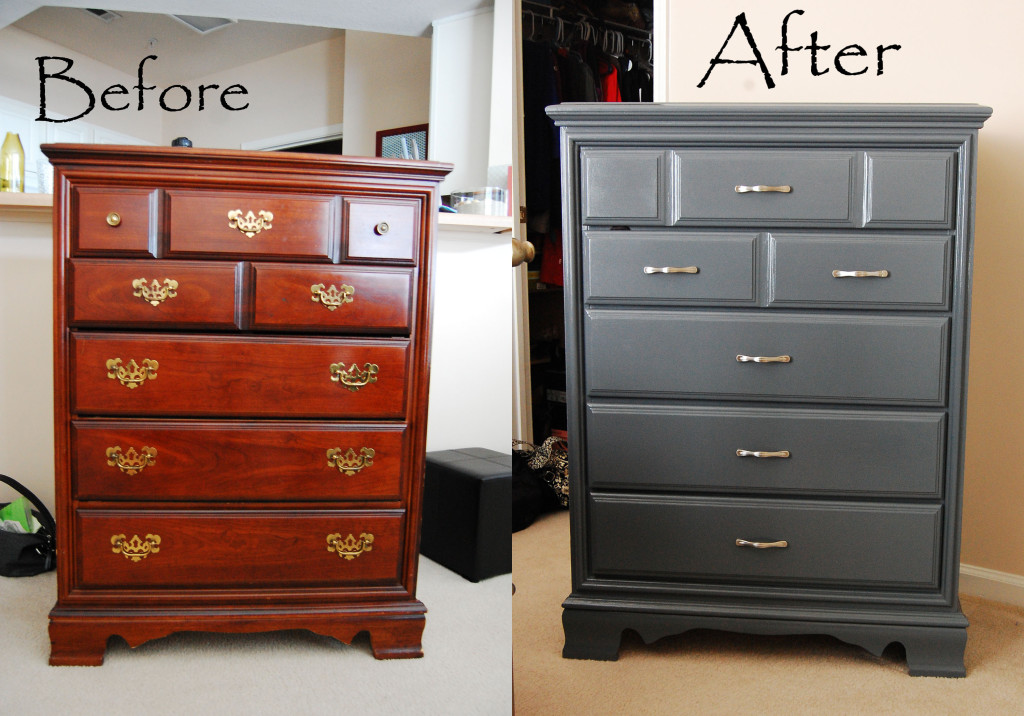
I have not decided if I want to paint or stain this dresser when I am done. I looked at the many online pictures and many seem to be painted. This must be the fad right now, however, I just stripped paint off and it is really hard work. I worry that the paint colour will go out of style and then I am right back to where I started! Look at this example I found online:
I think stain would be nice but then as I was watching a YouTube video, she suggested using something called “Tung Oil”. Now I really feel overwhelmed with options! And today I just discovered there is something called “chalk paint”! YIKES! Too many options. So let’s delve into what each one is!
Tung Oil has been around for thousands of years, originating in China. Because of its versatility, it can be applied to concrete, wood, stone, brick, or even metal surfaces. It requires anywhere from 3-5 coats and takes time to dry but is still popular because it is environmentally friendly and easy to use. I like that! How do you think it would look?
Left side of the dresser, tilted on its end
Stain. What is stain and how is it different from Tung oil? Well, wood stain is meant to enhance the colour of the wood enabling the natural wood grain to be visible. Stain is technically tinted, therefore the process is similar to painting. Therefore, stain actually changes the colour of the wood, unlike Tung oil. I am not sure what to think of this. Do I like the colour of the dresser? Here is a close up picture:
Chalk paint is meant to allow for more freedom and creativity so that painters can change their mind part way through. Chalk paint does not require a priming coat and is used to create a time-worn, vintage finish which is very popular right now.
I am content saying I am not interested in chalk paint and that I am leaning towards Tung oil. I think that is the look I am wanting! Within the next week I will get to go shopping for new hardware! This is starting to take shape! It has been a massive effort to remove the old green paint. I was not expecting it to be as difficult and time consuming as it has been but it has been very rewarding. I like that I can see immediate results each time I work on it!